Overview
Node cost optimization is a critical aspect of managing Kubernetes infrastructure efficiently. By identifying and prioritizing the node groups with the highest savings potential, you can implement targeted optimization strategies that deliver maximum ROI on your infrastructure spending.Identifying Node Groups with the Most Waste
The first step in optimizing node costs is to analyze your node groups and identify which ones have the most significant savings potential. This involves examining resource utilization patterns and waste metrics across your infrastructure.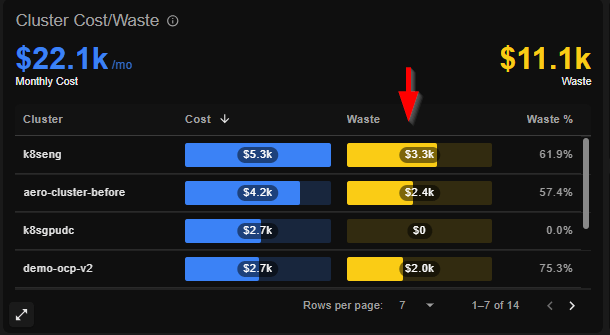
Key Metrics to Consider
When evaluating node groups for optimization opportunities, focus on:- Resource Utilization Gaps – Difference between requested resources and actual usage
- Idle Capacity – Nodes running with minimal workloads
- Oversized Instances – Nodes larger than necessary for current workloads

Three Optimization Strategies
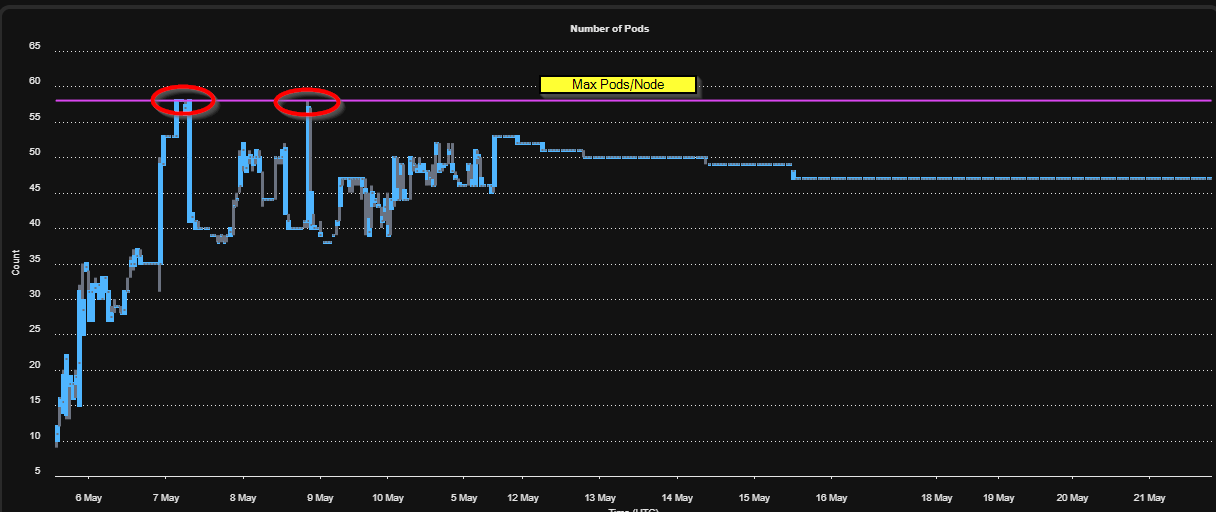
Once you’ve identified high-waste node groups, apply these proven optimization approaches:1. Optimize Pod Density (Low Hanging Fruit)
Check the max pods per node setting for your node groups. This configuration often limits the number of pods that can run on a single node, even when resources remain available. Impact: This is frequently the quickest win—increasing max pod density allows the autoscaler to provision more workloads on existing nodes, reducing the need for additional nodes. Action: Review your Kubernetes configuration and adjust pod density limits to match your actual resource constraints, not default limits.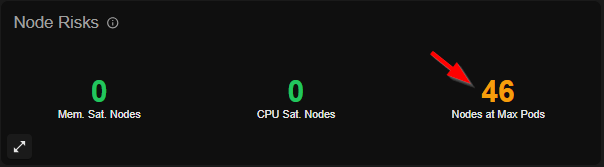
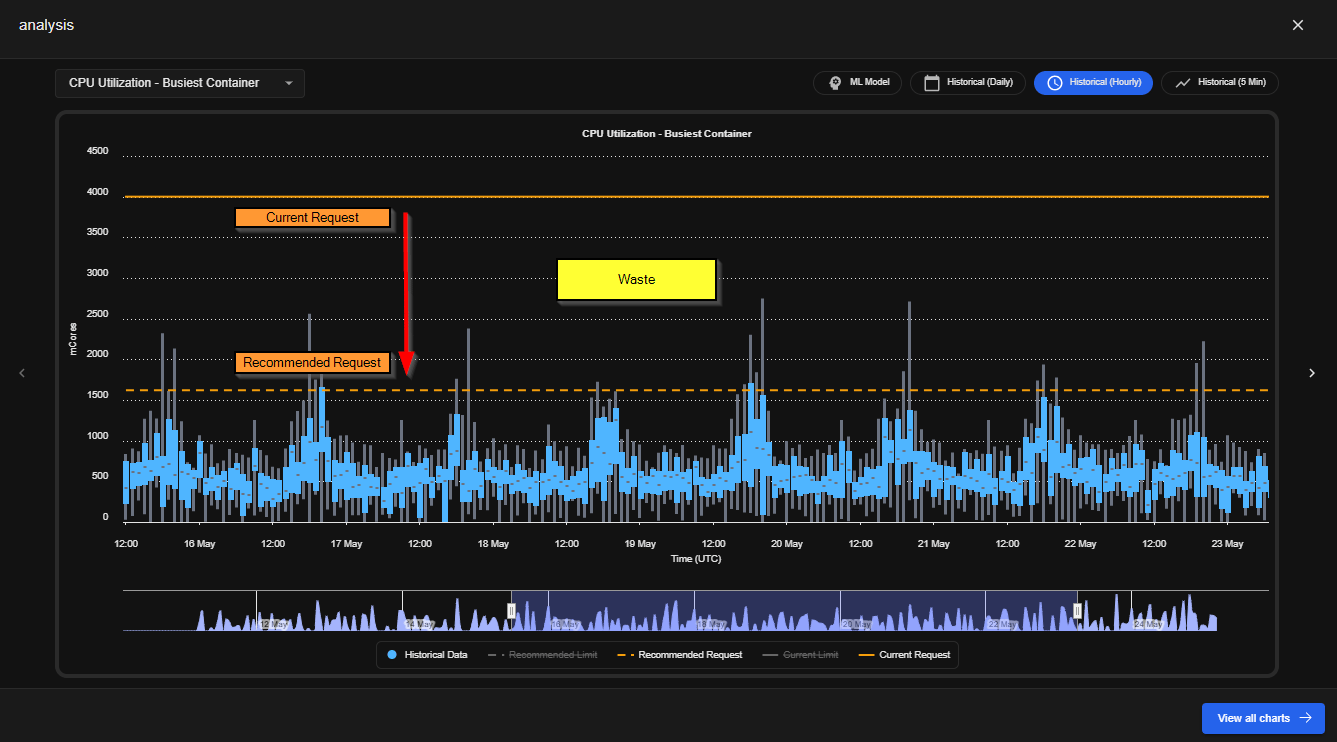
2. Right-Size Resource Requests and Limits
Verify that container CPU, Memory, and Ephemeral storage requests are aligned with actual usage patterns. The Problem: Misaligned resource requests lead to waste in two ways:- Over-requested resources – Nodes remain underutilized because pods reserve more capacity than they need
- Under-requested resources – Workloads may fail or perform poorly, requiring larger nodes than necessary
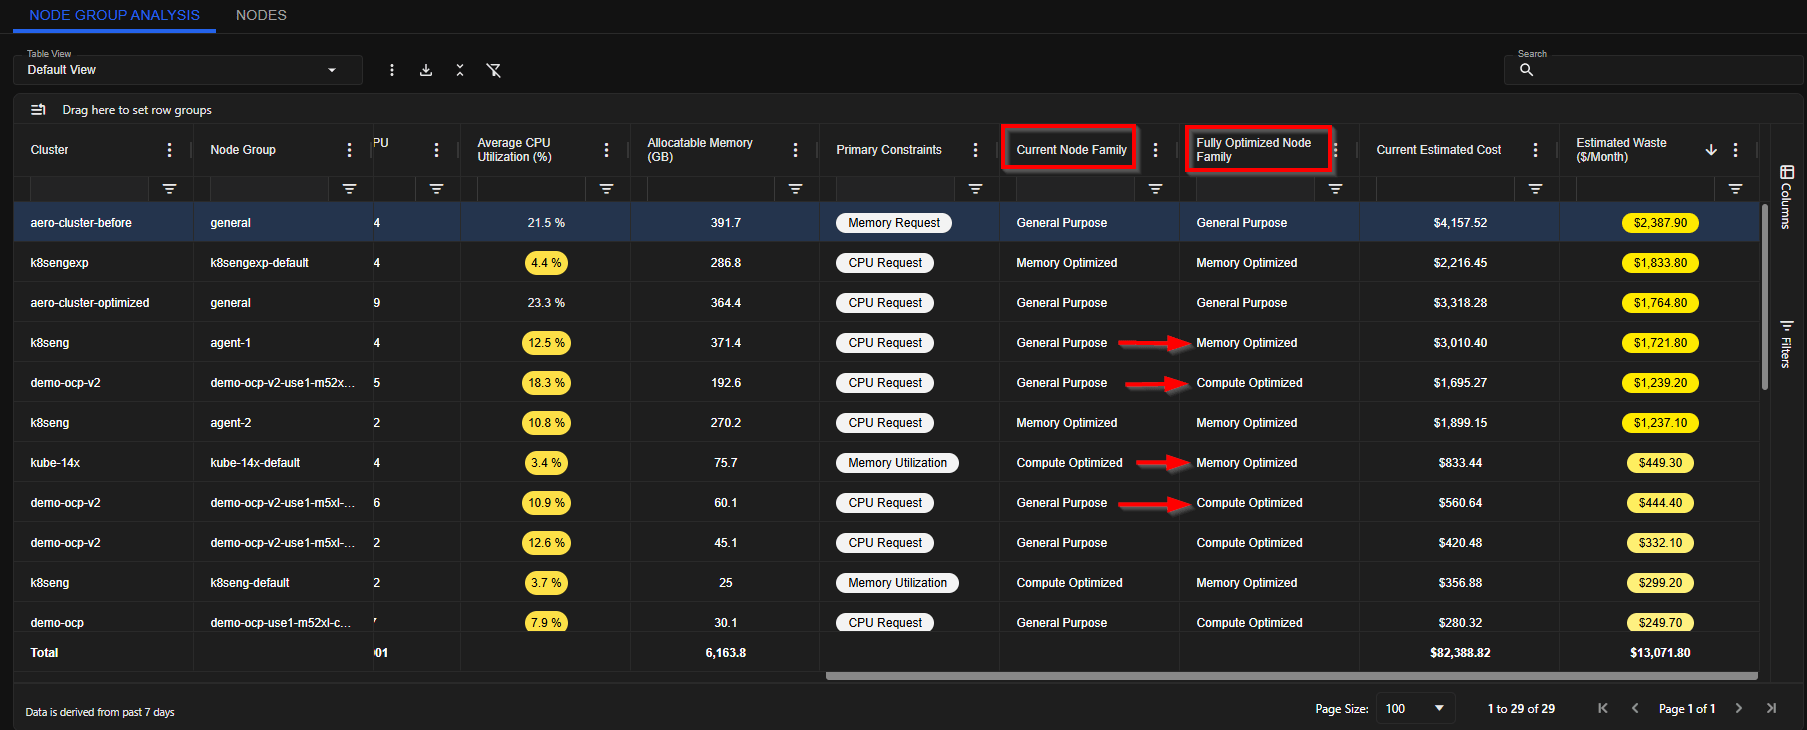
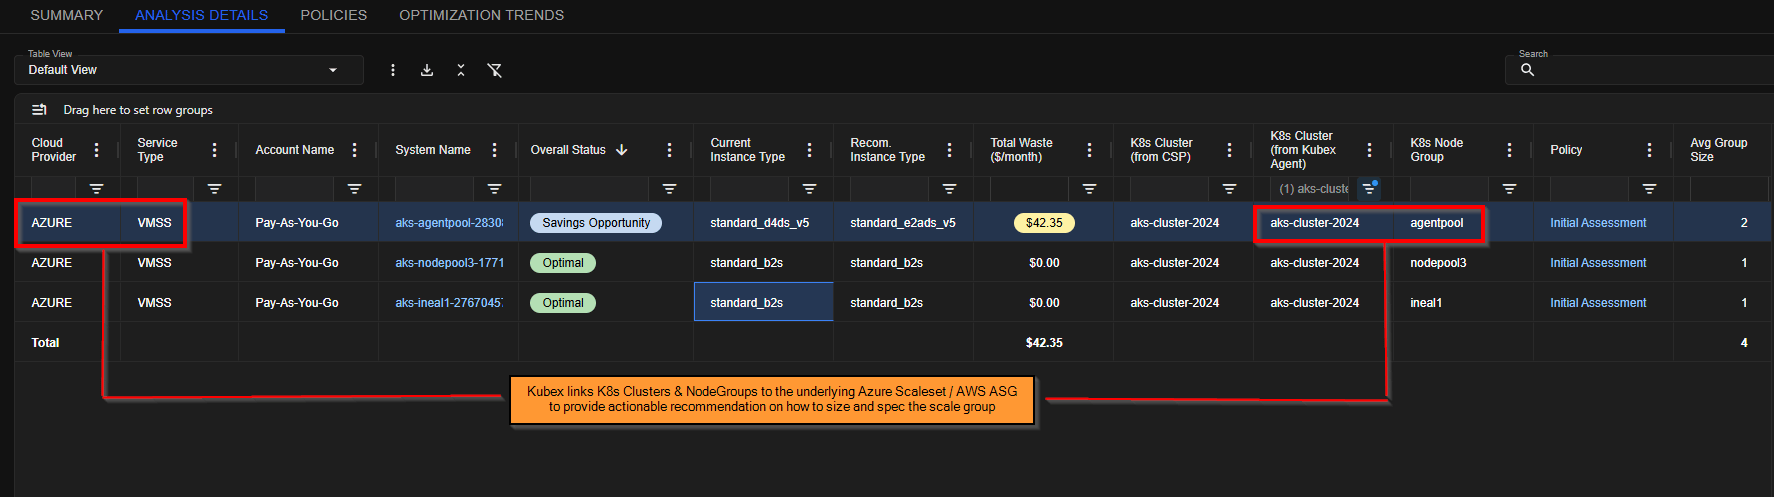
3. Match Instance Types to Usage Patterns
When using Scale Groups (such as AWS Auto Scaling Groups or Azure Scale Sets), the instance types must align with your workload characteristics. Key Considerations:- Memory-heavy workloads – Use memory-optimized instance types
- CPU-intensive workloads – Use compute-optimized instances
- General workloads – Use balanced general-purpose instances
Next Steps
Once you’ve identified your highest-priority node groups:- Apply the three optimization strategies – start with pod density (quick win), then resource requests, then instance type matching
- Monitor and validate improvements in utilization and cost metrics
- Plan migration strategies to minimize disruption when changing instance types
- Track ROI on optimization efforts